Data Ingress
This document is focused on data ingress methods supported by the RCC platform.
Currently, the RCC platform supports SFTP-based file ingress for transferring data into the secure environment.
SFTP Based File Ingress
Info
The SFTP service is made available to approved data providers upon request, if you've not been explicitly pointed towards using this service then you most likely don't have access. Access is provided on a project by project basis depending on data sharing agreements.
If this service looks like a good fit for your needs please get in touch with us via the IT Services Helpdesk or if you are an external data provider please reach out to your UoS contacts.
To upload data to the SFTP system it's assumed you will be able to install an AWS Transfer Family supported SFTP client.
Take a look at the docs AWS docs here or skip ahead to connecting for information on supported clients.
This section of the docs is aimed at those looking to upload data to the SFTP service. The process is broken down into two steps:
- Generating credentials to be used to access the system.
- Connecting and uploading data.
Generating Keys
Should you be granted access to the service you'll need to generate an RSA or ECDSA key pair, and forward the public key to your internal contact.
We suggest you use PuTTYgen to generate keys on Windows machines. This is included in the full installer of Putty found here.
From PuTTYgen select either EdDSA or RSA as the type of key to
generate, then click on "Generate":

With the key generated we highly recommend you enter a strong password in the key passphrase fields before saving the private key. As the name suggests this key is private and should not be shared with anyone!
You'll also want to save the public key, this is the file you'll need to send on to your internal contact.
Mac and Linux machines come with the ssh-keygen command baked in and
can be used here to generate the keys we require.
Run the below via a terminal replacing <key-name> with a filename of
your choosing. You may wish to cd into a suitable directory first.
This command will ask you to enter a passphrase for the key, we highly recommend you do so.
Once this has been entered the system will generate 2 new files, your
private key is the file with the name you specified after the -f and
the public key which is the same again but suffixed with .pub
Take care to keep your private key safe as it should not be shared with
anyone! The <key-name>.pub file should be forwarded onto your internal
contact.
Connecting
Once you've been given the green light that your account has been created with the public key you've provided from the steps above you'll want to connect into the service to start transferring data.
sftp.rcc.shef.ac.uk via port 22 is the primary endpoint for
accessing the service. Use this when configuring the server address and
port with the software suggested below.
Although we're tool agnostic this document providing step by step guidance for WinSCP. Should you feel confident with configuration other good tools such as FileZilla will work just fine.
You'll first need to change some settings in WinSCP:
Open the preferences dialogue box from the Options menu in the top right.
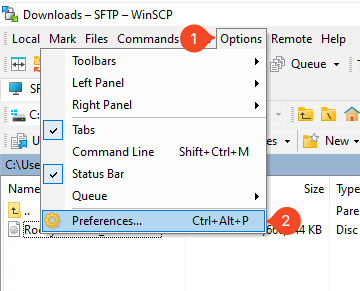
From here navigate to the "Transfer" tab, select "Default" and "Edit...":
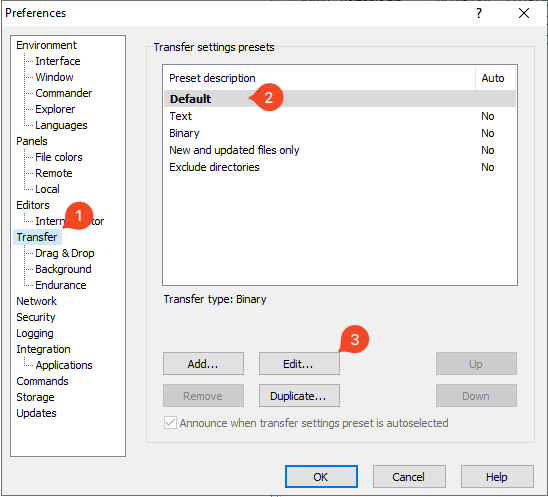
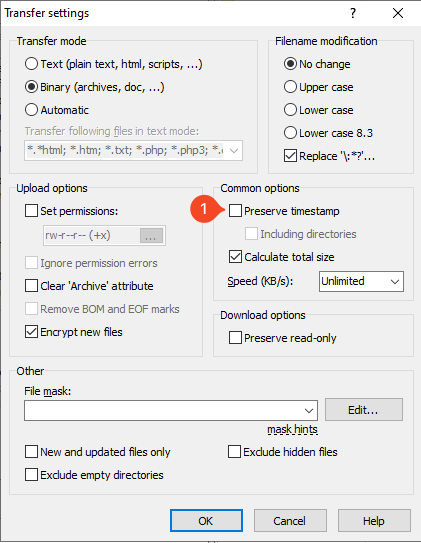
This will open the "Transfer settings" box, from here ensure the "Preserve timestamp" box is unchecked:
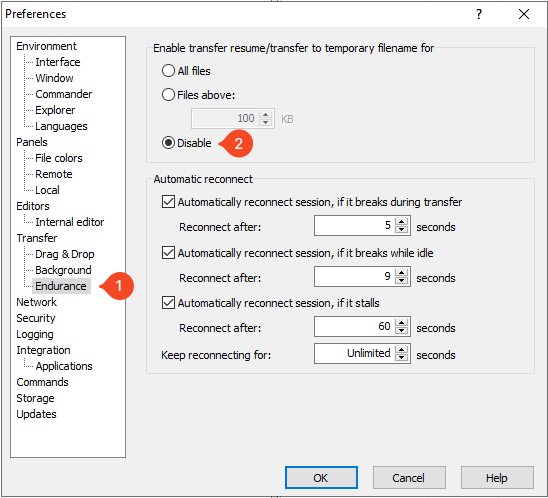
After confirming the transfer settings, enter the "Endurance" tab below and set the "Enable transfer resume/transfer to temporary filename for" setting to "Disable":
With these now set you may need re-open WinSCP to see the Login form,
once open you'll want to make sure that the file protocol SFTP is
selected:
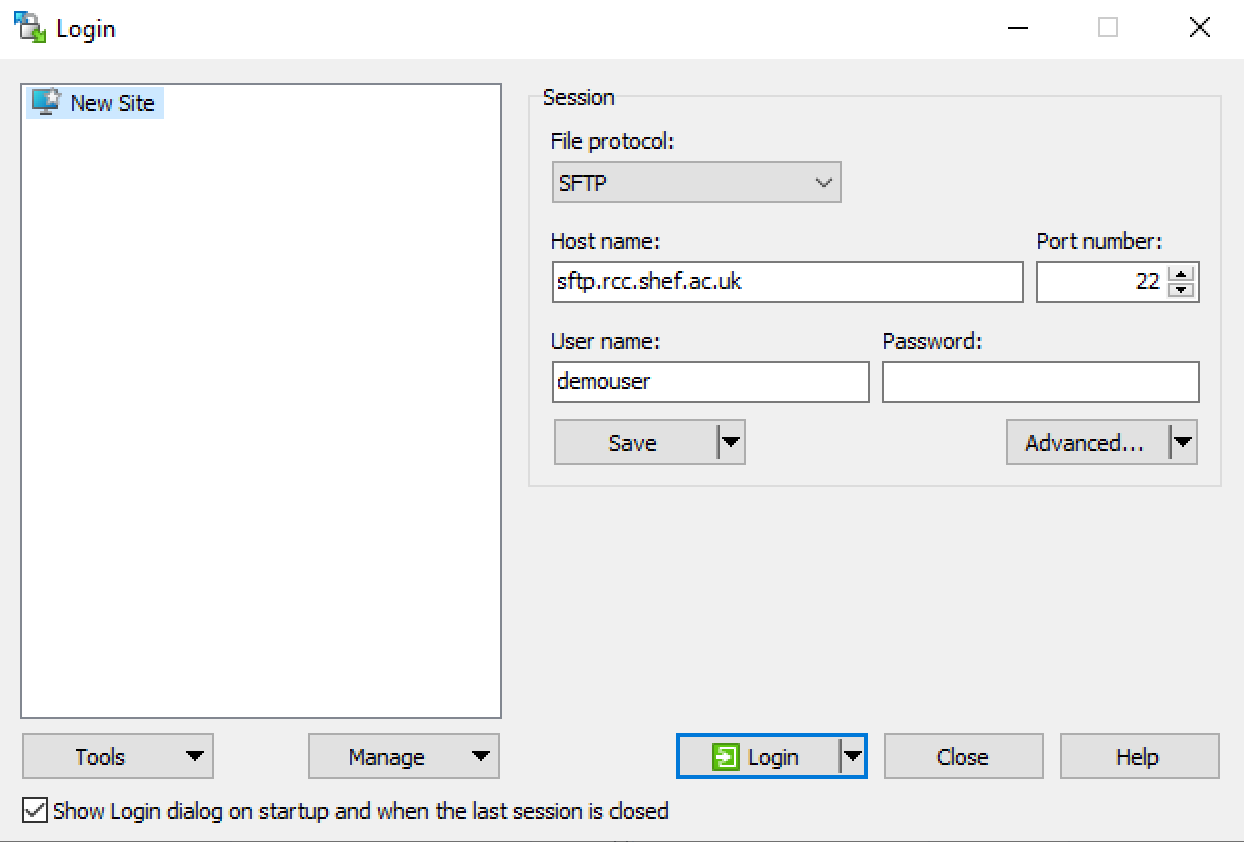
With the server address entered in the host name and user name fields
entered in you'll want to click on the Advanced... button to select
your private key.
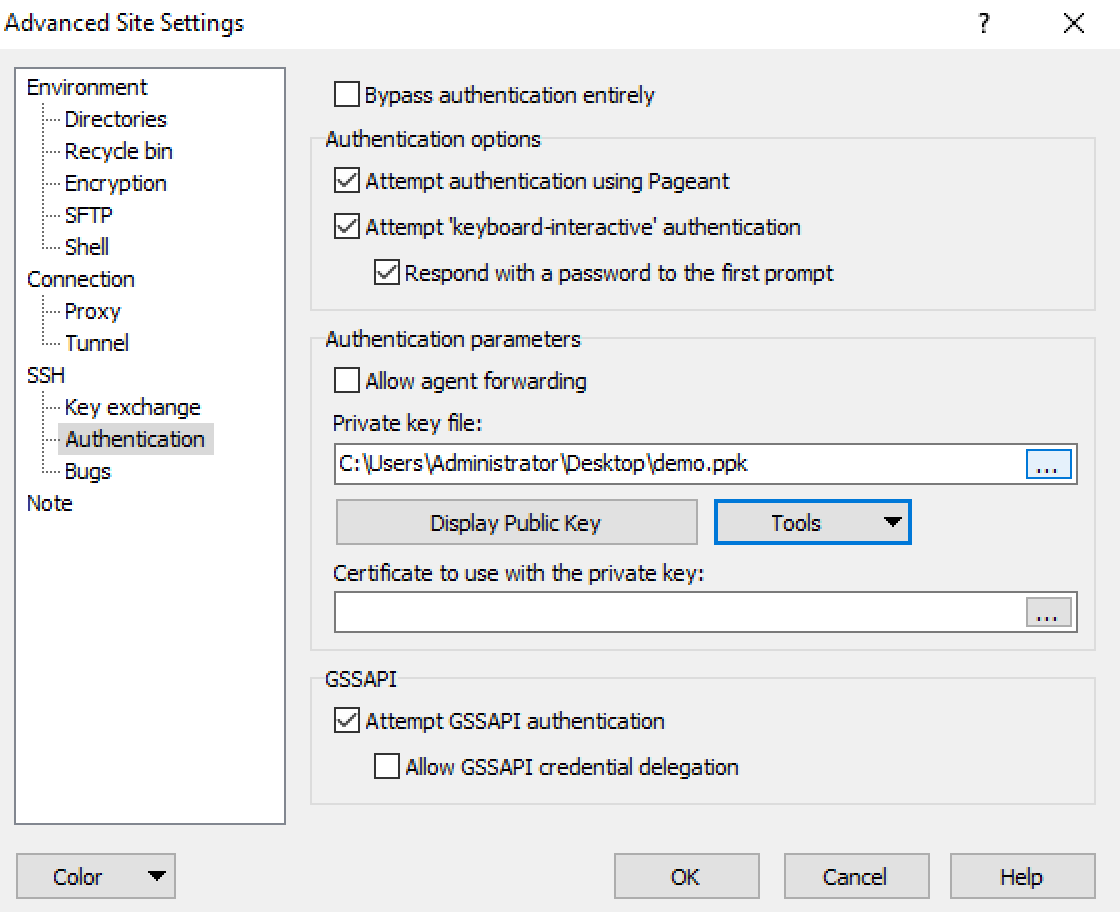
From the left hand side of this new menu go to the
SSH - Authentication tab and under the text box for Private key file: click on the ... button to open a file selection
prompt. This will allow you to select the private key .ppk file you generated in the steps above.
With those filled you should now be able to log into the SFTP service.
Accessing Data
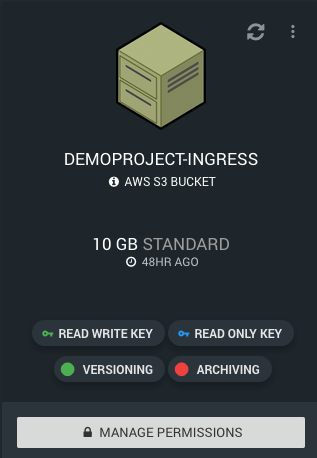
Once data has been uploaded via the SFTP mechanism, it will be placed inside a new bucket within your project with the name <PROJECT NAME>-ingress.
Warning
A bucket with this prefix is created when the SFTP ingress system is first used if one does not already exist. If you have already created a bucket with this naming structure, be warned that this service will interact with that bucket.
The upload process to the SFTP ingress mechanism is one-way, meaning that data that comes into the system cannot go out this way. For example, if you were to upload data directly into this bucket (outside of the SFTP mechanism), it will not be made accessible to the SFTP users. At a technical level, objects within the ingress bucket are air-gapped from the SFTP ingress mechanism.
Note
You are free to use the ingress bucket; however, it is strongly advised that you move data out and into a more suitable location for regular usage as newly uploaded data could overwrite files of the same name.